
Denys is the Motion Design School’s script wizard and the author of the Expression Trip course. In this article, he will share how expressions can be used to create more complex animation.
Popular expressions
As you’ve learned from the previous article on top 3 After Effects Expressions to simplify your workflow, programming in After Effects, besides being totally not scary, can actually save you a lot of time. In this article I will show you how you can go even further in the use of expressions by not just looping keyframes, but creating completely new and unique animation without (or almost without) using keyframes and manual works.
Let’s start with probably the most important expression in your life. This is going to be the expression for creating damped oscillations.

Check our Expression Trip course.
Before we start
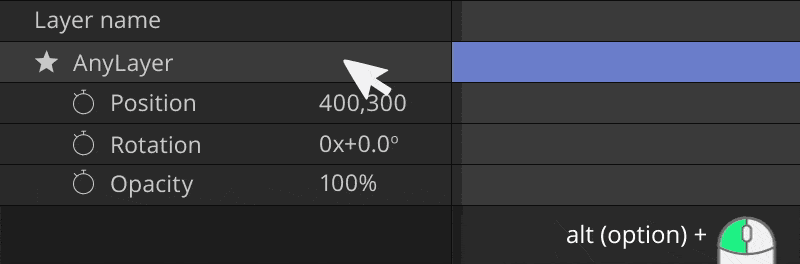
It is easy to add an expression to a property — just click on it holding Alt key (or Option on Mac):
1. Elastic and Bounce
If you aren’t yet familiar with this expression, don’t even dare tell anyone you’re a motion designer. The Elastic expression will help you to make your animation more lively, vibrant, and less rigid. This expression is present almost in any decent script with animator tools like Motion Tools, DUIK and others. This tool is so important that we all are waiting for it to be added to the standard After Effects tools for a long time already. But for now, we still have to add an expression to keyframes properties:
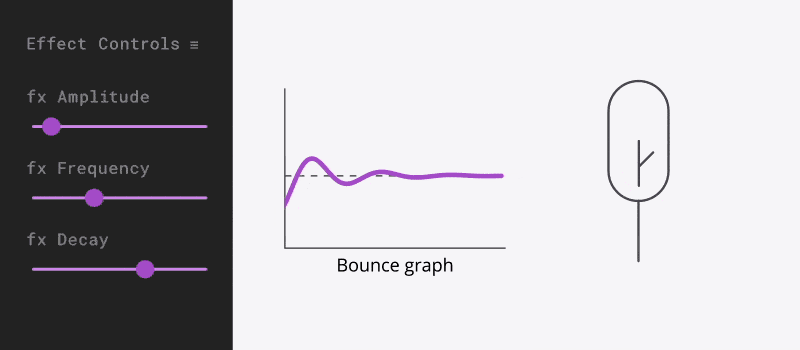
amp = .1; // Amplitude
 freq = 2.0; // Frequency
 decay = 2.0; // Decay
 n = 0;
 if (numKeys > 0){
 n = nearestKey(time).index;
 if (key(n).time > time){
 n--;
 }}
 if (n == 0){ t = 0;
 }else{
 t = time - key(n).time;
 }
 if (n > 0 && t < 1){
 v = velocityAtTime(key(n).time - thisComp.frameDuration/10);
 value + vampMath.sin(freqt2Math.PI)/Math.exp(decayt);
 }else{value}
Problem solving: You have added the expression, but nothing happens?
There may be several reasons for this:
- Make sure that the speed in the last keyframe isn’t set to 0 in the speed graph.
- Make sure you add it to properties expressed in numbers, like Position, Scale, and so on, but not to Path.
Advanced tip: Add expression controls to the layer and link ‘amp’, ‘freq’ and ‘decay’ variables to them. It will help you to control your animation from Effects Panel.
If you want to apply this expression with controls just in one click (even to several layers simultaneously) — I have a great news for you. Our students get the free Motion Tools script, which has user-friendly controls that allow adding this expression to any number of properties. In order to get this script for free, enroll in our Fundamentals on After Effects course.
2. Time
Time expressions probably are most complicated for understanding when it comes to beginner animators. Time lies at the root of many expressions where seamless animation is required. It’s like a foundation to ensure that the animation based on expressions works.
Here’s one of the most simple examples of the use of this expression:
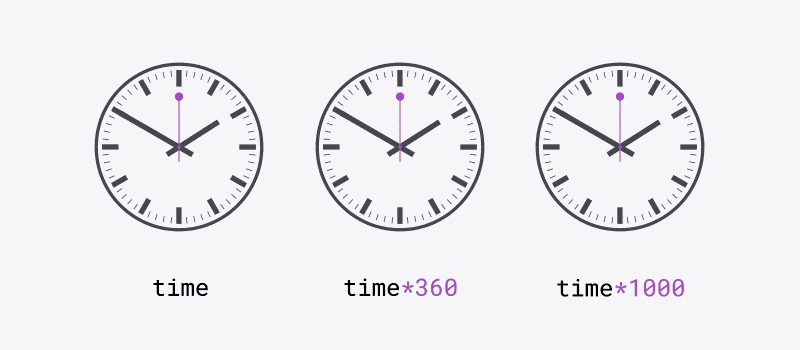
The values of the ‘time’ variable equals the timecode on the timeline. Thus, if you multiply ‘time’ by 360, you accelerate the speed of your animation, and in one second, instead of 1 degree, the hand of the clock moves 1*360. That’s just the way it is 🙂
Advanced Expression Version
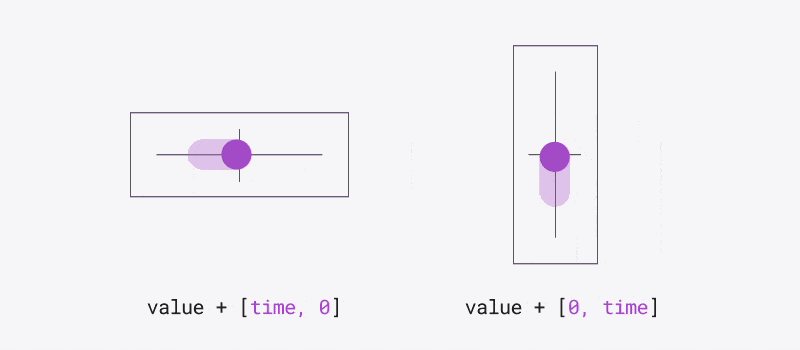
Simple expressions won’t work correctly if you add them to the properties with more than one value. As it is for wiggle, you need to additionally specify for which of the axes the animation is needed. And also, typing in “value +’ at the beginning of a new line, you will keep the option of adjusting the values manually. “- inPoint” gives you the option of offsetting the animation together with layer shifting along the Timeline.
speed = 100;
 t = (time - inPoint) * speed;
 // value + t  // also copy this line if you need to continue to manually change the value
 // value + [t, 0]  // x axis animation
 // value + [0, t]  // y axis animation
3. Sin
What you might not have loved much in school, in fact, comes in really handy in motion design. This is the expression for animating bounces without using keyframes. They’re not as random as the ones that Wiggle creates, but predictable and even. Like time, sin and cos lie at the heart of more complex animations based on expressions.
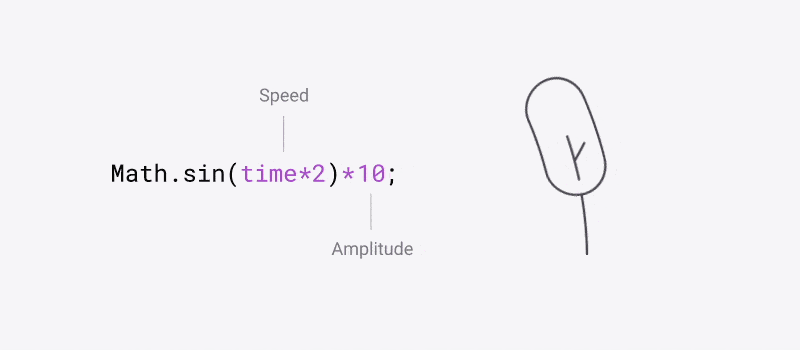
speed = 2;
 amp = 100;
 Math.sin(time * speed ) * amp ;
Advanced Expression Version
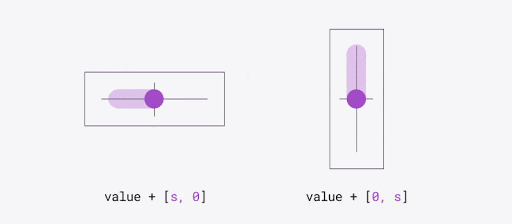
In the extended version of the expression we’ve added animation loop that is a multiple of seconds. It is also possible to offset the animation in the Timeline by a certain number of frames. Also, to apply it to a specific axis, simply keep one of the last three lines that you need.
sp = 100;
 amp = 100;
 offset = 0;
 s = Math.sin(time * Math.PI * 2 * sp + offset*thisComp.frameDuration) * amp;
 value + [s, s]; // symmetric animation, for example it is used on scale/size properties
 // value + [s, 0]  // x axis animation
 // value + [0, s]  // y axis animation
Bonus: Text Typing Animation
As a bonus, we’ve created an expression to animate typing with a blinking cursor. Even though a task like this is pretty rare, there might have been at leat one time in your life when you did that manually. So, how does it work? Add this expression to the Source Text parameter. In the first line, you can set a cursor symbol, and also set the blink time in the second line.

cursor = "|";
 blinkTime = 1;
 charMod = 1;
 num = effect("Slider Control")("Slider");
 toggle = effect("Checkbox Control")("Checkbox");
 if (toggle == 1) {
     t = ((time - inPoint) / blinkTime) % 1;
     if (num.numKeys > 2) {n = 0} else {n = 1}
     ux = Math.abs(num.speedAtTime(time + thisComp.frameDuration*n));
     blink = Math.round(ux + t);
     if (blink == 0) {
         cursor = " ";
     }
 } else {
     cursor = " ";
 }
 if (charMod == 0) {
     textAnim = num * text.sourceText.length / 100;
 } else {
     textAnim = num;
 }
 text.sourceText.substr(0, textAnim) + cursor
To make it work, add Slider Control and Checkbox Control to a layer.
That’s It.
I hope these expressions will help you improve your animations or at least will save you some time. Don’t forget to subscribe to our newsletter to get helpful information about animation and motion design regularly.
Want to know more about animation?

Breakdown of Frame-by-Frame Animation
In this short frame-by-frame animation tutorial, I’ll show you how to create and animate an illustration from scratch. We’ll start with a sketch and will go all the way up to post-production. To do this you’ll only need Photoshop for drawing and for frame-by-frame animation and After Effects to put it all together nicely and […]
Exponential scale in After Effects
How often you want to achieve the exponential scale. You’ve probably tried to do that with graph editor, but it’s almost impossible. In that case, we’ve prepared the two ways how to do it quickly. Right-click on selected keyframes, go to keyframe assistant and choose an exponential scale. That’s it! Another way is to use […]
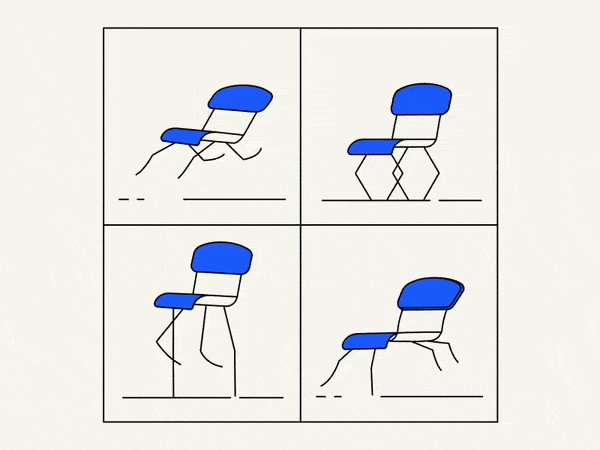
Running Chair Animation Breakdown in After Effects
New “How to” create a funny chair run cycle in After Effects.
